Chrome push notification을 기존 GCM이 아닌 FCM으로 붙여보자.
먼저 클라이언트 쪽 세팅을 해준다.
1. index.html
firebase 관련 javascript를 CDN을 통해 import 한다.
<head>
<link rel="manifest" href="/js/manifest.json">
</head>
<body>
<script src="https://www.gstatic.com/firebasejs/4.2.0/firebase-app.js"></script>
<script src="https://www.gstatic.com/firebasejs/4.2.0/firebase-messaging.js"></script>
<script src="https://www.gstatic.com/firebasejs/4.2.0/firebase-auth.js"></script>
<script src="https://www.gstatic.com/firebasejs/4.2.0/firebase.js"></script>
<script src="/js/firebase_init.js"></script>
<script src="/js/notification_manager.js"></script>
</body>
2. manifest.json을 추가한다.
GCM Sender ID는 따로 수정하지 않는다.
{
"gcm_sender_id": "103953800507",
}
3. firebase_init.js 를 만든다.
var config = {
apiKey: "[서버의 API KEY]",
authDomain: "[콘솔의 프로젝트 이름].firebaseapp.com",
databaseURL: "https://[콘솔의 프로젝트 이름].firebaseio.com",
messagingSenderId: "[발신자 ID]",
};
firebase.initializeApp(config);
서버의 API Key 및 발신자 ID 는 firebase console 의 설정 - 클라우드 메시징에서 확인이 가능하다.
4. notification_manager.js 를 만든다.
FCM Service worker의 역활을 한다. 토큰을 받아오고, 서버로 토큰을 전송하며, 실제 메세지를 받았을 때에도 웹사이트가 떠 있을 경우 처리한다.
const messaging = firebase.messaging();
messaging.onTokenRefresh(function() {
messaging.getToken()
.then(function(refreshedToken) {
console.log('Token refreshed.');
setTokenSentToServer(false);
sendTokenToServer(refreshedToken);
resetUI();
})
.catch(function(err) {
console.log('Unable to retrieve refreshed token ', err);
showToken('Unable to retrieve refreshed token ', err);
});
});
messaging.onMessage(function(payload) {
console.log("Message received. ", payload);
receivedMessage(payload);
});
function receivedMessage(payload) {
alert(payload);
// TODO : notification이 왔을 때 처리를 도맡아 한다.
}
function resetUI() {
messaging.getToken().then(function(currentToken) {
if (currentToken) {
sendTokenToServer(currentToken);
updateUIForPushEnabled(currentToken);
} else {
console.log('No Instance ID token available. Request permission to generate one.');
updateUIForPushPermissionRequired();
setTokenSentToServer(false);
}
})
.catch(function(err) {
console.log('An error occurred while retrieving token. ', err);
showToken('Error retrieving Instance ID token. ', err);
setTokenSentToServer(false);
});
}
function sendTokenToServer(currentToken) {
if (!isTokenSentToServer()) {
console.log('Sending token to server...' + "\n" + currentToken);
// TODO : send token to server (실제 서버로 토큰을 전송하자)
setTokenSentToServer(true);
} else {
console.log('Token already sent to server so won\'t send it again ' + 'unless it changes' + "\n" + currentToken);
}
}
function isTokenSentToServer() {
return window.localStorage.getItem('sentToServer') == 1;
}
function setTokenSentToServer(sent) {
window.localStorage.setItem('sentToServer', sent ? 1 : 0);
}
function requestPermission() {
console.log('Requesting permission...');
messaging.requestPermission().then(function() {
console.log('Notification permission granted.');
resetUI();
})
.catch(function(err) {
console.log('Unable to get permission to notify.', err);
});
}
function deleteToken() {
messaging.getToken().then(function(currentToken) {
messaging.deleteToken(currentToken)
.then(function() {
console.log('Token deleted.');
setTokenSentToServer(false);
resetUI();
})
.catch(function(err) {
console.log('Unable to delete token. ', err);
});
})
.catch(function(err) {
console.log('Error retrieving Instance ID token. ', err);
showToken('Error retrieving Instance ID token. ', err);
});
}
function updateUIForPushEnabled(currentToken) {
}
function updateUIForPushPermissionRequired() {
Notification.requestPermission();
}
resetUI();
5. firebase-message-sw.js 를 만들어 상위 폴더에 넣어준다 (/public)
웹사이트가 떠 있지 않을 때 (브라우져상에서 없을 때 처리)
importScripts('https://www.gstatic.com/firebasejs/4.2.0/firebase-app.js');
importScripts('https://www.gstatic.com/firebasejs/4.2.0/firebase-messaging.js');
importScripts('/js/firebase_init.js');
const messaging = firebase.messaging();
messaging.setBackgroundMessageHandler(function(payload) {
console.log('[firebase-messaging-sw.js] Received background message ', payload);
});
해당 웹사이트를 돌리면, 콘솔에 token이 찍히게 된다.
예를 들어 "czKLLl66-Hg:APA91bEZEVhjp-LiYTaIV_8yZ-HLf0Gq3bQ2dj4BbD-9PMbqApXhinGDEnVWvp8ZGFsMEx1s9jWEQXL0Dpdg76E-en954lEGGn6edxugmTN0yl3AhS-5pzaivKOYEc9Uy4MoehqXBepA"
서버쪽에서 해당 토큰(registration_id)로 FCM을 Sending 한다.
서버쪽 세팅을 한다.
1. 'FCM' Gem 을 추가한다.
Gemfile
gem 'fcm'
2. 특정 모델에 class method로 테스트 코드를 추가해보자.
def self.send_notification
fcm = FCM.new("[서버 API 키]")
registration_ids= ["[콘솔에서 찍혔던 client의 token]"]
options = {data: {score: "123"}, collapse_key: "updated_score"}
response = fcm.send(registration_ids, options)
end
3. 콘솔에서 해당 메소드를 실행시켜보자.
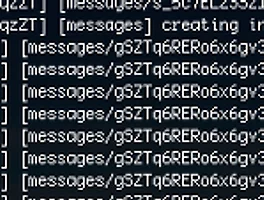
콘솔에서 Message 와 payload를 받은 것이 확인된다.
'옛글 > Ruby on the Rails' 카테고리의 다른 글
| Rails upgrade 5.2 to 6.0 (27) | 2019.05.24 |
|---|---|
| Mac Postgres install and command (0) | 2019.03.27 |
| [Ruby on rails] ElasticSearch 를 붙여보자 (0) | 2017.04.14 |
| [Ruby on rails] Sidekiq이 버벅거린다면, Rails sidekiq process 갯수 늘리기 (0) | 2017.04.13 |
| [Ruby on rails] 서버 속도 (+MYSQL)를 개선해보자! (0) | 2017.04.12 |